Chinese Roast Bbq Pork Buns
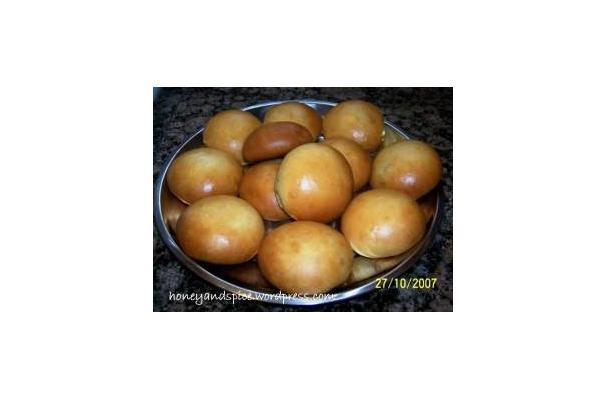
When we lived in London, there was a Chinese bakery, Tai Pan, that was about 10 minutes walk from our house. We would occasionally go there for a weekend raid, of course, we didn’t have room for dinner that night. They made everything on site, from the delectable char siu bao (roast pork bun/barbecue pork bun) to the delicate daan tat (egg custard tarts), from the delicious gai mei bow (coconut bun, chicken tail bun) to the mouthwatering celebration cakes. I really miss that place. You can also buy all that stuff here in the US, but I’m allergic to everything! I’ve been craving char siu bao for so long, I had to find a recipe that I could make at home. A friend of ours W, invited us around to his house for dinner one night. It was “Chinese”-themed. It was as good a time as any, to try out my first batch of char siu bao. The bread was tender and soft, the filling was meaty, slightly sweet and absolutely more-ish. However, saying that, I think I may change the bread dough recipe next time… I made 16, but only 12 of them managed to get to W’s house – I’ve no idea what happened to them!
Total Steps
7
Ingredients
20
Tools Needed
8
Ingredients
- 1 teaspoon peanut oil
- 1 bunch spring (green) onions, finely sliced
- 4 teaspoons oyster sauce
- 1 teaspoon dark soy sauce
- 2 teaspoons tomato puree
- 1 tablespoon sugar
- 1 pinch black pepper
- 6 tablespoons ready-made chicken stock
- 1 teaspoon sesame oil
- 2 teaspoons shaoxing wine
- 200 grams diced char siu (Chinese roast pork)
- 1 tablespoon dried active yeast
- 100 grams sugar
- 160 milliliters hand hot water
- 400 grams white bread flour or plain flour (all-purpose)
- 1 egg egg, lightly beaten
- 80 milliliters oil
- 4 teaspoons water
- 16 squares parchment paper
- melted butter for brushing(optional)
Instructions
Step 1
To make the filling - in a large<a href="/NZ2LK8CC"> frying</a> pan <a href="/MYJ2HRB7">(skillet</a>),<a href="/XZFHRHHF"> heat</a> the oil until hot and sauté the spring (green) onions until fragrant, about 2-3 minutes. Add the remaining ingredients and <a href="/DRM2WPZ4">stir </a>until thick and bubbly. When <a href="/GZFHJC5K">cool,</a> cover and allow to <a href="/FK6MC4B6">chill </a>in the <a href="/ZSSVQ6FG">refrigerator </a>overnight.
Step 2
To make the dough – in the bowl of a stand mixer, place the oil, sugar, <a href="/HF7TLMS7">yeast,</a> egg and water. With the dough hook attachment, on medium speed, gradually add the flour until a soft and elastic dough is formed. Continue to <a href="/FZZDJ42W">knead </a>on a medium speed for an additional 10 minutes. Cover the bowl with cling-film (plastic <a href="/X75YQJ6B">wrap)</a>, place into the <a href="/ZSSVQ6FG">refrigerator </a>and allow for an overnight cold prove.
Step 3
Take out the dough and sit at room temperature for about 1 hour. Punch the dough down and divide into 16 equal sized pieces, covering them with a damp cloth.
Step 4
Flatten a dough ball slightly, making the edges thinner than the middle and fill it with approximately 1 tablespoon of filling, <a href="/K4VJ7RZ7">seal </a>and place onto a piece of parchment paper <a href="/K4VJ7RZ7">seal </a>down. Repeat with the rest of the dough and filling.
Step 5
Cover the filled bao with a cloth and allow to prove for 1-1 ½ hours or until puffy and well risen.
Step 6
<a href="/H3S4YV46">Preheat </a>the oven to 180°C (350°F) and ba<a href="/RNT367Z2">ke th</a>e buns in the middle of the oven for 15-20 minutes (tur<a href="/B52FHCF2">ning hal</a>f way to ensure even bro<a href="/D434P8MH">wning).</a>
Step 7
As soon as the buns come out of the oven, brush with <a href="/LWS4TC42">melted butter </a>and leave to <a href="/GZFHJC5K">cool </a>slightly before devouring. Enjoy!