Portal Cake
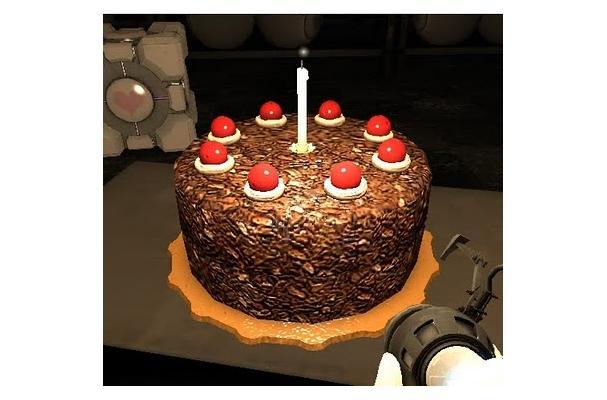
This is my interpretation of the famous cake from Portal the video game, the cake which spawned the internet meme "the cake is a lie." The creators or Portal were inspired by a black forest cake from their local bakery. originally appeared here: http://www.geekychef.com/2010/09/delicious-and-moist-cake.html
Total Steps
30
Ingredients
18
Tools Needed
9
Ingredients
- 1 2/3 cup all-purpose flour
- 1 1/2 cup granulated sugar
- 2/3 cup unsweetened cocoa powder
- 1 1/2 teaspoon baking soda
- 1 teaspoon salt
- 1 1/2 cup buttermilk
- 1/2 cup vegetable shortening
- 2 large eggs
- 1 teaspoon vanilla extract
- 1/2 cup Kirsch (cherry liqueur)
- 1/4 cup Kirsch
- 2 can sour cherries
- 3 cup heavy whipping cream
- 1/4 cup confectioners' sugar
- 3 tablespoons cocoa
- 1 bar semisweet chocolate
- 8 pieces maraschino cherries (no stems)(optional)
- white candle
Instructions
Step 1
Preheat your oven to 350°F.
Step 2
Grease and flour two 8-inch cake pans, or line with parchment paper.
Step 3
Sift together the flour, cocoa powder, baking soda, and salt.
Step 4
Set the sifted dry mixture aside.
Step 5
Beat the shortening and sugar together until fluffy.
Step 6
Add the eggs and beat thoroughly.
Step 7
Add vanilla extract.
Step 8
Slowly beat in the flour mixture, occasionally alternating with the buttermilk.
Step 9
Beat until combined.
Step 10
Pour the batter into the prepared cake pans.
Step 11
Bake for about 35 or 40 minutes, or until a fork or wooden pick comes out clean when inserted into the cake.
Step 12
Let the cake cool completely. The cake will be easier to cut if you keep it in the fridge for a few hours before cutting.
Step 13
After the cake has cooled, cut each layer in half horizontally to make four total layers.
Step 14
Sprinkle the layers with the 1/2 cup of Kirsch.
Step 15
Drain the canned cherries in a colander to remove most of the juice.
Step 16
Beat the heavy whipping cream with confectioners' sugar until it thickens to desired texture.
Step 17
Put a small amount of the cream/sugar mixture aside for garnish.
Step 18
Mix the 3 tablespoons of cocoa into the remaining majority of the whipped cream frosting.
Step 19
Place one cake layer on the serving dish you wish to use.
Step 20
Spread about one-sixth of the whipped cream on the layer, and strew a third of the cherries on top of the whipped cream.
Step 21
Add the second cake layer on top of the first.
Step 22
Spread one-sixth of the whipped cream on the second layer and one-third of the cherries on top.
Step 23
Add the third cake layer.
Step 24
Spread one-sixth of the whipped cream on that and add the remaining cherries.
Step 25
Top with the last cake layer.
Step 26
Frost the top and sides of the cake with remaining frosting. Use a potato peeler on the semisweet chocolate bar to create thin shaves.
Step 27
Gently pat the chocolate shaves onto the sides and top of the cake, completely coating it.
Step 28
Use the whipped cream you set aside earlier to place eight small circles around the top of the cake.
Step 29
Place your non-stemmed maraschino cherries on each cream circle.
Step 30
Place white candle in the center and light. Congratulations, you have made the cake a reality!