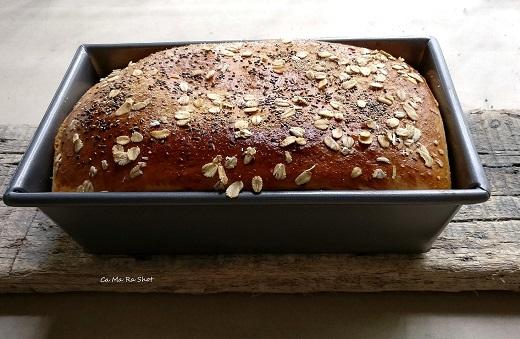
SINGLE RISE WHOLE WHEAT BREAD
Total Steps
17
Ingredients
14
Tools Needed
1
Related Article
SINGLE RISE WHOLE WHEAT BREADIngredients
- 200 grams All-purpose flour (maida)
- 100 grams Whole wheat flour (atta)
- 2 teaspoons Instant yeast
- 3 teaspoons Coconut sugar (or other sugar)
- 3/4 teaspoons Salt
- 40 grams Butter, melted and lukewarm
- 1 unit Egg
- 160 grams Milk, lukewarm
- 1 teaspoon Oil, for coating dough
- 2 teaspoons Neutral oil (e.g., Sunflower)
- 1/2 unit Egg, lightly beaten
- 1 teaspoon Wheat bran
- 1 teaspoon Chia seeds
- 2 teaspoons Whole oats
Instructions
Step 1
– In the bowl of the KitchenAid Bowl Lift Stand Mixer, add the ingredients 1-5. Using the flat beater (paddle), mix together the ingredients at speed 1 for around 2 minutes.
Step 2
– Mix the ingredients 6-8 lightly in a small bowl and add it to the above.
Step 3
– Run the mixer for around 3 minutes starting from speed 1 for a minute and ending with speed 2 till the wet and dry ingredients come together.
Step 4
– Stop the mixer and switch the paddle for the dough hook.
Step 5
– Run the mixer for a total of 6-7 minutes, stopping from time to time to scrape down the sides with a silicon spatula.
Step 6
– When the dough comes together into a smooth, cohesive mass, gather it out of the bowl. It will weigh nearly 600 gm.
Step 7
– Shape the dough with your hands into a 9 x 5 inch cylinder (you can also shape it anyway you like)
Step 8
– Grease the Loaf pan with 2 teaspoons of oil and place the dough log into it.
Step 9
– Brush 1 teaspoon of oil on the surface of the dough and cover the pan loosely with cling film. Keep in a warm place for 30 min or until it rises to half an inch above the pan rim..
Step 10
– Pre-heat the oven to 230 degrees Celsius (or 250 if your oven permits)
Step 11
– Brush the top of the dough lightly with the beaten egg, using a silicon brush.
Step 12
– Sprinkle the toppings evenly
Step 13
– Place the loaf pan in the pre heated oven.
Step 14
– Reduce the temperature to 180 degrees C after 5 minutes or after the top of the loaf gets brownish
Step 15
– Bake for another 25 minutes or until the loaf sounds hollow when tapped.
Step 16
– Remove and invert immediately onto a wire rack to cool.
Step 17
– Slice only after it cools completely to room temperature.