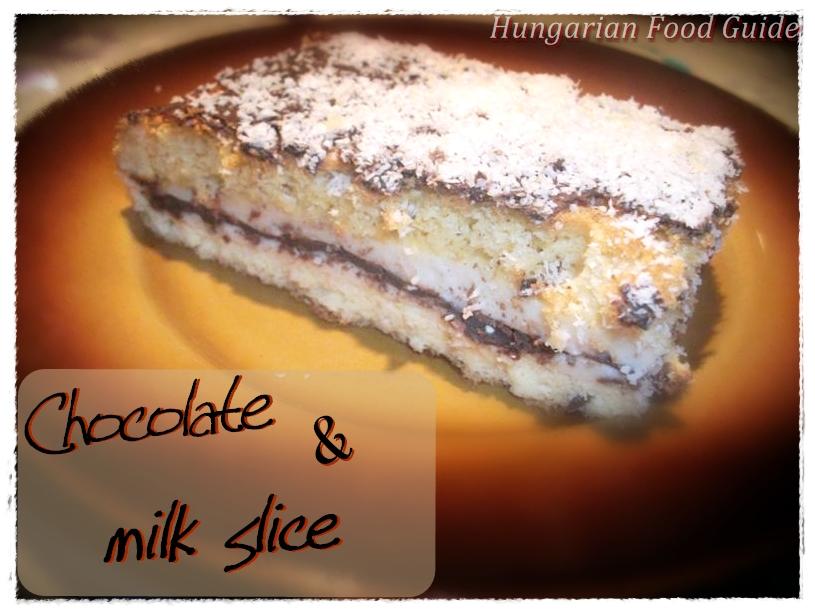
Chocolate & Milk Slices
Total Steps
14
Ingredients
15
Tools Needed
1
Related Article
Chocolate & Milk SlicesIngredients
- 6 eggs
- 2 tablespoons vanilla sugar
- 6 tablespoons flour
- 1 tablespoons baking powder
- 6 tablespoons sugar
- 6 tablespoons milk
- 500 ml sour cream
- 5 tablespoons sugar
- 10 g gelatin
- 2 tablespoons water
- 2 tablespoons flour
- 2 bars dark chocolate
- 100 g margarine
- 1 teaspoon oil
- coconut(optional)
Instructions
Step 1
Firstly, we bake the sponges. For that, separate the egg whites, and whisk them with the vanilla sugar, to get a foam.
Step 2
2. Add the other ingredients in the upper column to the yolks, and mix them. (flour, baking powder, sugar, milk)
Step 3
3. Gently add the foam to it.
Step 4
4. Place baking sheets to a tray, and in two sections, bake plain sponges. Bake them in 150' Celsius for about 10-15 minutes, till it's golden brown. You will have two sponges.
Step 5
5. Mix the gelatin in a little water, heat it a bit, then mix it to the sour cream. Add the sugar as well, then heat the whole cream up. You should stir it the whole time. Finally, add 2 tbsp of flour to it, and boil it again.
Step 6
6. Melt a bar of chocolate (in the microwave, 3 minutes on 350 W), and melt the margarine, too, and mix them.
Step 7
7. Take a baking tray, and place one of the sponges into that.
Step 8
8. Lubricate it with the half of the milky cream.
Step 9
9. Than lubricate the chocolate cream on it.
Step 10
10. Cover it with the other half of the milky cream.
Step 11
11. Finally, cover it with the other sponge, up-side-down.
Step 12
12. Melt the other bar of chocolate, add to it a little oil, and "paint" the cake with it, the whole surface of it.
Step 13
13. You can strew a bit coconut on the top. Place the cake to the fridge for a night.
Step 14
Then You can serve it! :) Enjoy!