I ❤ Ny: A Homemade Bagel Adventure
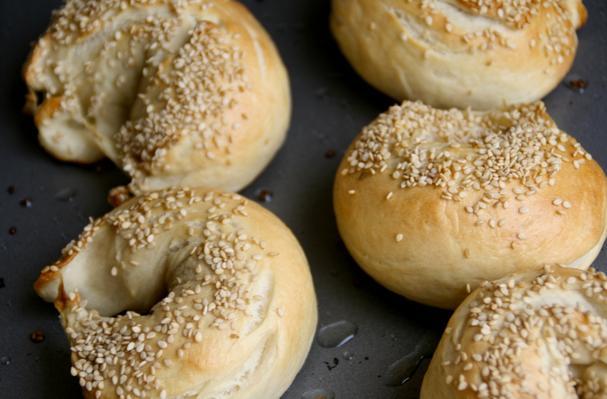
Having lived in New York for five years, stopping to snag a bagel before a walk in Central Park was a normal, comforting activity. I am now in China and there's not a bagel to be seen for miles and miles on end. What do they say- you don't know what you've got until it's actually gone? Well, that's my tragic story with bagels. Flipping through Nigella's "How to be a Domestic Goddess, Baking and the Art of Comfort Cooking" many times, this bagel recipe stood out among the rest. It's much easier than you'd think making bagels would be, and is definitely worth the manual labor involved in kneading. Note: As you shape them the dough into rings, make sure to pinch the ends of the bagels together HARD- much harder than you think. I have to work on my bagel-shaping skills, as about half of the batch came out shaped like croissants..
Total Steps
9
Ingredients
8
Tools Needed
11
Ingredients
- 6 2/3 cups bread flour or all-purpose flour
- 1 tablespoon salt
- 1 package rapid-rise yeast (¼ oz) such as Fleischman's
- 2 tablespoons sugar
- 1 tablespoon vegetable oil
- 2 1/4 cups warm water
- 2 tablespoons malt syrup or sugar
- sesame seeds or other top-garnish(optional)
Instructions
Step 1
Combine the flour, <a href="/DPSVTKVY">salt,</a> and <a href="/HF7TLMS7">yeast </a>in a large bowl. Add sugar and oil with the<a href="/FVYNJCCW"> warm</a> water,<a href="/7S3QCKWK"> mixing</a> together slightly (or, until the sugar<a href="/64W3NS5R"> melts</a>). Make a well in th<a href="/RF7SRX43">e dr</a>y ingredients and add the wet, using a woode<a href="/NX588QBK">n spoo</a>n t<a href="/7S3QCKWK">o mi</a>x into a coarse dough.
Step 2
Dump this dough onto a clean, floured surface (or into your kitchen-aid mixer). <a href="/FZZDJ42W"> Knead</a> by hand or hook, trying to add more flour if you<a href="/TPWNYF5L"> can</a>. Ofte<a href="/482ZKJDV">n brea</a>d doughs are sticky and wet, for these bagel<a href="/RF7SRX43">s dr</a>y is good.
Step 3
After about 10 minutes of hard, full body kneading-I like to stand on a mini step-stool to give me full leverage)-the stiff dough will become smooth and elastic. Even with an easy dough-hook <a href="/FZZDJ42W">kneading </a>process Nigella says it will take a good ten minutes.
Step 4
Lightly oil a new bowl, form the dough into a ball and place in the bowl, <a href="/B52FHCF2">turning </a>the dough once-over to fully <a href="/6BTCX64M">coat </a>with a light film of oil. Cover the bowl with plastic<a href="/X75YQJ6B"> wrap</a> and leave it to rise for about 1 hour. The dough, after that time, will be almost twice its size, and when you poke it with your finger a dent should remain.
Step 5
Again, on a very lightly floured surface (the dough is oiled and not too wet, so it won't be too sticky anyway) dump the ball of dough out onto your counter. Punch the dough down, HARD, and<a href="/FZZDJ42W"> knead</a> a couple of times. Divide the dough into 3 pieces, an<a href="/LTNN8R88">d rol</a>l these <a href="/TJ2NZ6YT">3 segment</a>s into even logs. Divide each log again, this time into 5-6 pieces<a href="/LTNN8R88">. Ro</a>ll each piece between your palms into a nice ball (this is where I started having some problems coercing the dough into the smooth shapes I wanted).
Step 6
<a href="/LTNN8R88">Roll </a>these balls into a thick rope, curling it around so the ends meet into a ring. <a href="/K4VJ7RZ7">Seal </a>the ends by overlapping slightly and pinching them together. I've also ready that with these balls, you<a href="/TPWNYF5L"> can</a> flatten them into a<a href="/QQVZX64Y"> dish</a> and using any pointy-tip objects (hello, chopsticks) create a hole in the center. That's a method I will try next time...
Step 7
Take out two large <a href="/RNT367Z2">baking </a>pans, and brush with a good amount of oil. Set the bagels onto the sheets, cover with tea towels and let sit for about 20 minutes. In the meantime, set one or two large pots of water onto the stove, an<a href="/B52FHCF2">d tur</a>n to a boil. When the water begins to boil, add the sugar. (2 tbsp for each pot)
Step 8
At this time the bagels should be plump, and have risen to actually look like pre-cooked bagels (because they are, duh). Start<a href="/SNDRKPSQ"> poaching</a> them. Drop the bagels into th<a href="/W7VKDJHH">e boilin</a>g water<a href="/W7VKDJHH">, boilin</a>g for about 1 minute. Using two cooking tools- in my case a spatula and a plastic egg flipper spatul<a href="/B52FHCF2">a- tu</a>rn over itself, making sure the bagels g<a href="/6BTCX64M">et coat</a>ed in the nice swe<a href="/W7VKDJHH">et boili</a>ng bath.
Step 9
As the bagels are finish <a href="/SNDRKPSQ">poaching,</a> place them back onto the well-oiled <a href="/RNT367Z2">baking </a>sheets. Dust with sesame<a href="/FYFCQVPR"> seeds</a> or any other top-garnish, spacing them about 1 inch apart.<a href="/RNT367Z2"> Bak</a>e for 10-15 minutes until shiny and golden.