The Anatomy Of Jam...
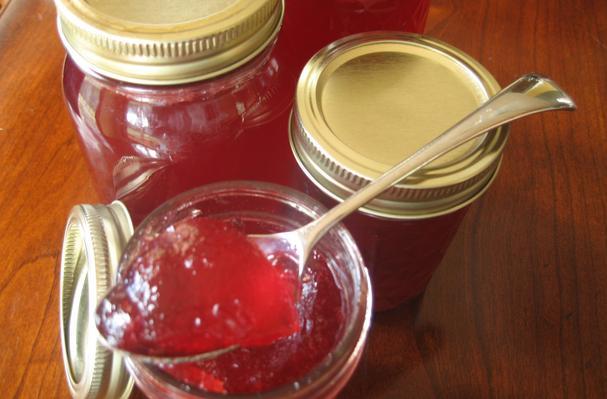
For the longest time I didn't have the slightest idea what made a Jam a "Jam" or a Jelly a "Jelly", let alone the difference between a Conserve or Preserve. To make matters even more complicated there are even more choices when canning fruits; Butters and Marmalade! Pickles and Chutneys could also be added to the list but for now we'll hold off and dive into that lesson another day. There are so many choices, so how’s a person supposed to choose? The best place to start is at the beginning with what sets each choice apart from the other. Jam: Jams are made by cooking crushed or chopped fruits with sugar until the mixture is thick and stays firm on a spoon. Jams can be made of one fruit or a mixture of fruits. When complete, Jam will be spreadable but not retain the shape of the jar. Jelly: Juice is strained from fruit to make Jelly. It is usually made so that the end result is very clear without fruit bits or seeds. Jelly is firm but spreadable and will hold its shape on a spoon. Marmalade: Marmalade is a soft spreadable product with small bits of fruit and peel suspended in a clear jelly. Marmalade must be made in small batches and almost brought to a rapid boil. This causes the fruit to reach the "gelling point" (see description below). Marmalade is very similar to jam but more robust in texture and flavor. Preserves: Simply, fruit preserved with sugar so it retains its original shape, cooked till the liquid is clear and the fruit is plump and tender. Some preserves can be as thick as jelly but most are thin enough to spoon over other foods, like ice cream with apricot preserves. Preserves do not hold their shape when removed from the jar. Butters: Fruit butters are made by blending fruit to a pulp and adding sugar, cooked down slowly so that the butter will spread easily over toast etc. Butters are thick and will keep their shape on a spoon. Conserve: Conserves are similar to jam but contain two or more combinations of fruits and nuts. Conserves are thick and hold their shape on a spoon. Nuts are optional, but if used must be added to the recipe in the last five minutes of processing.
Total Steps
11
Ingredients
1
Tools Needed
8
Ingredients
- 1 pouch 3 oz liquid pectin
Instructions
Step 1
Gelling Point:
Step 2
The gelling point test is used for recipes that don't require commercial pectin products to check for doneness. I use the "Spoon and <a href="/ZJ3WDM5Q">Plate </a>methods".
Step 3
<a href="/NX588QBK">Spoon </a>Method:
Step 4
Remove your sauce pan from the stove so the recipe does not continue to cook. To check for doneness for jams, jellies and marmalades place a small amount of hot liquid in a <a href="/NX588QBK">spoon,</a> holding the <a href="/NX588QBK">spoon </a>over your saucepan tilt the <a href="/NX588QBK">spoon </a>to drain liquid back into pan, at first the liquid will look like syrup and run from the <a href="/NX588QBK">spoon </a>when tilted.
Step 5
Return saucepan to <a href="/XZFHRHHF">heat </a>and cook 3 to 5 minutes longer and repeat this process. As you get closer to the gelling point the liquid will show signs of "sheeting". Sheeting is when the liquid begins to form or gel and the drips look larger and begin to slow when the <a href="/NX588QBK">spoon </a>is tilted.
Step 6
Finally, when the gelling point is reached the liquid will break from the <a href="/NX588QBK">spoon </a>in a large sheet or clump. Remove from <a href="/XZFHRHHF">heat </a>and fill and process jars per the recipe instructions.
Step 7
<a href="/ZJ3WDM5Q">Plate </a>method:
Step 8
Place a small amount of hot liquid on a cold <a href="/ZJ3WDM5Q">plate; </a>place the <a href="/ZJ3WDM5Q">plate </a>in the freezer until the spread is room temperature. Using your index finger, gently run your finger through the gelled liquid. If the liquid seperates then returns to is original shape, the jelly is ready to process.
Step 9
It may sound complicated at first but once you've tried it a few times you'll begin to see the changes and know when your jam, jelly etc. have reached the gelling point.
Step 10
Never fear!!! If it doesn't work the first time you <a href="/TPWNYF5L">can </a>reprocess the unset portions by returning the unset jam or jelly to a saucepan and bring it to a roiling <a href="/W7VKDJHH">boil </a>again. Follow the steps for the Gelling Test as before. If you're unable to succeed after 20 minutes add 1 3 oz pouch of liquid pectin, <a href="/W7VKDJHH">boil </a>for 1 minute, <a href="/V7ZY4CRW">skim </a><a href="/FZB4VFPV">foam </a>and return to <a href="/WZLWW3YP">clean </a>jars; process the jars in a <a href="/Y8FLVD37">water bath </a>for 15 minutes.
Step 11
There is never a failure in <a href="/TPWNYF5L">canning </a>just a lesson learned. If I'm in no mood to reprocess the unset jars I just keep the jars <a href="/K4VJ7RZ7">sealed </a>until I'm ready to use the unset portions like syrup. My family never complains when I have fresh berry syrup to pour on their pancakes or yogurt