Total Steps
15
Ingredients
4
Tools Needed
13
Ingredients
- Food
- Beefsteak tomatoes(optional)
- Plum (or Roma) tomatoes(optional)
- Meat(optional)
Instructions
Step 1
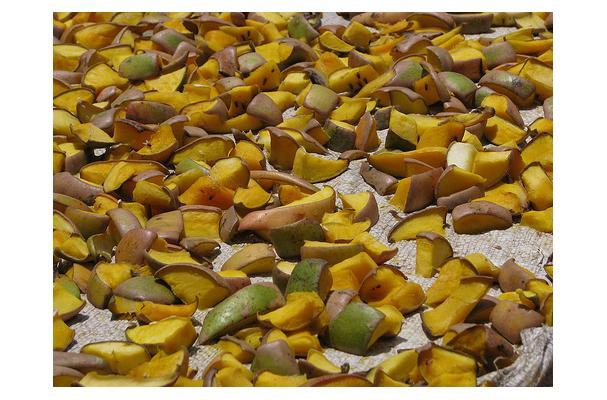
Understand the essential conditions for sun drying: consecutive sunny days (ideally in the 90s Fahrenheit), low humidity, low air pollution, and good air circulation. Be aware that sun drying takes considerably longer than using electric dehydrators and carries a risk of food being infested by insects. Good air circulation is crucial to carry moisture away from the food and prevent rotting.
Step 2
Prepare your drying setup: Place the food on a nonmetal tray, preferably with a nonmetal screen between the tray and the food for enhanced air circulation. Cover the food with a protective netting, such as a cheesecloth.
Step 3
Place the entire setup in direct sunlight where there is good air circulation. The food must be checked frequently and rotated. If using a solar dryer, or to speed up drying time, a fan can be used to rotate the air.
Step 4
Once drying is complete, check the food for dryness. Remove the pieces that are fully dry, noting that pieces not uniform in size will dry at different rates. Leave any remaining pieces for a longer period if needed.
Step 5
If you suspect any insect infestation, pasteurize the packaged dried food by freezing it for at least 48 hours before placing it into storage containers.
Step 6
Once you are sure the food is completely dry and free of bugs, store the dried foods in glass jars, plastic containers, or food-grade heavy plastic freezer bags. These should then be stored in metal or plastic containers with tight-fitting lids.
Step 7
Optionally, label the containers with their contents, the date, and the rehydrating procedure.
Step 8
Store the packages in a dry, dark, cool area. The lower the temperature, the longer the shelf life. Ideally, the food should be kept below 60 degrees Fahrenheit.
Step 9
Store dried meat specifically in the freezer.
Step 10
If the food has been dried properly, it should last from 6 months to 1 year. If stored at low temperatures, the shelf life can be even longer.
Step 11
Rotate the dried food to ensure freshness and better nutritional value.
Step 12
Periodically, check your stored foods for mold, moisture, or insects. If mold is present, discard the food.
Step 13
To rehydrate beefsteak tomatoes, cover them with cold water for 15 minutes, then drain. For plum (or roma) tomatoes, cover with cold water and let sit for at least 30 minutes, then drain.
Step 14
It is important not to leave food in soaking water too long without refrigeration, due to the risk of bacterial growth.
Step 15
Dried foods can be used in various dishes such as casseroles, pasta sauces, pesto, stews, salads, pizza, vegetable dishes, for marinating, omelets, breads, spreads, and butters.