Miss Kitchenista - Chicken Nachos
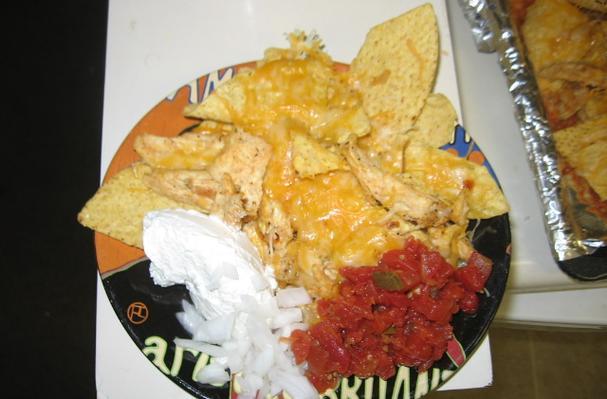
I love making these. They're simple to make, and easily feeds 2 or a crowd of people. I have more pictures on my website.
Total Steps
10
Ingredients
16
Tools Needed
4
Related Article
http://lifesafeast.blogspot.com/2009/07/man-in-moon.htmlIngredients
- 2 breasts boneless skinless chicken
- 1 package of Shredded Mexican blend cheese
- 1 package of Shredded Cheddar cheese
- 1 bag of Tortilla chips
- 1 package of taco seasoning
- salt
- pepper
- oil
- lettuce(optional)
- tomatoes(optional)
- onions(optional)
- 2 tablespoons water(optional)
- refried beans(optional)
- olives(optional)
- jalapenos(optional)
- salsa(optional)
Instructions
Step 1
Take 2 chicken breasts, <a href="/H7TNTGFZ">season </a>both sides with <a href="/DPSVTKVY">salt </a>and pepper.
Step 2
Put oil in pan. <a href="/NZ2LK8CC">Fry,</a> or <a href="/2V2PRWTZ">grill </a>the chicken, until no longer pink inside.
Step 3
<a href="/H3S4YV46">Preheat </a>over to 325º. While that’s pre <a href="/XZFHRHHF">heating </a>you <a href="/TPWNYF5L">can </a>go ahead and <a href="/QMX3H88P">shred </a>your lettuce, dice tomatoes and onions.
Step 4
Take the chicken from the pan, make sure it cooked though. Let it rest for about 2 mins, to get the <a href="/QDWRNXYW">juices </a>back in place. <a href="/3JDX2Q84">Slice </a>the chicken at an angle (to be fancy) or just <a href="/QMX3H88P">shred </a>it.
Step 5
Optional: I used a little taco <a href="/MYJ2HRB7">seasoning </a>on my chicken. I put it back in the pan, with the <a href="/MYJ2HRB7">seasoning,</a> added some diced onion, and about 2 tbs of water. Do this to give it that “simmered all day in the pot” <a href="/WDCS6JL5">taste. </a>Like I said totally optional, but worth it.
Step 6
Get out a <a href="/RNT367Z2">baking </a><a href="/QQVZX64Y">dish,</a> casserole <a href="/QQVZX64Y">dish,</a> brownie pan if you like – I used my broiler pan. It’s big! I like BIG! Layer it with aluminum foil for easy <a href="/WZLWW3YP">clean </a>up. (I hate <a href="/WZLWW3YP">cleaning </a>up.) :[
Step 7
Began by layering your chips in a single layer. Chips, cheese, chicken, cheese. It’s all up to you, how much chips and how much cheese you got. I used a whole bag of chips. If you opted to use refried beans put them on after the chips, before the cheese.
Step 8
Into the 325º oven for 7-10 mins. Check it frequently until you get the desired <a href="/64W3NS5R">melt </a>of the cheese. Make sure everything is nice and gooey <a href="/64W3NS5R">melted.</a>
Step 9
Take out the oven and <a href="/HZXPVMNR">garnish </a>with your <a href="/R34ZSY3M">toppings.</a>
Step 10
<a href="/R34ZSY3M">Toppings: </a>tomatoes, lettuce, olives, jalapenos, onions or <a href="/TXZ7QBJN">salsa</a>