


People either love or hate squash. In my case, it's both. Frozen squash, that generic brick of yellow sludge that some of us grew up trying to conceal in our napkins - hate it. Worse, our mothers said it was good for us -- kiss of death.
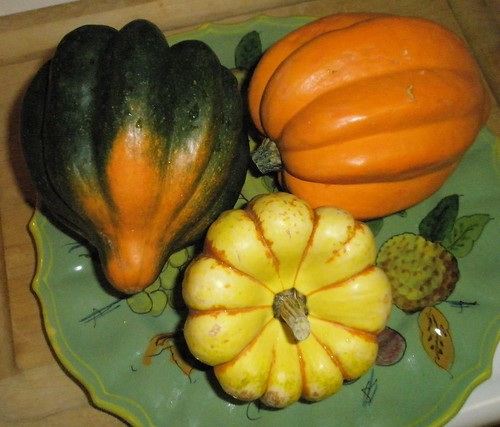
Fresh squash on the other hand is a wonder, especially this time of year when varieties are plentiful and story book colorful. They're almost too pretty to eat, but not quite.
This preparation combines microwave and conventional cooking to reduce the overall time involved. I had more than enough squash for one meal so I did a savory topping and a sweet topping. As a bonus you get toasted seeds, not much extra work and a really fine treat. You can "teriyaki" them or not as you like. I like.
With a glass of wine in hand the time will fly and you will have lots of tasty squash left over to puree or use in another meal. The seeds will all get eaten up before you finish the bottle of wine, guaranteed.
INGREDIENTS:
Winter squash, each squash quartered and seeds and pulp removed
Olive oil or melted butter for brushing
1/4 c Brown sugar
1-2 large cloves garlic, put through a press or chopped
1/2 t Ground cinnamon
1/4 t Ground cloves or ginger or both
1/2 t pepper or other savory spice (we also added some dried oregano)
water. orange juice, white wine or chicken broth
Soy sauce, teriyaki sauce or Ponzu sauce for seasoning seeds, optional
PREPARATION: microwave stage
Select a microwave and oven-proof casserole large enough to hold the squash
Brush bottom of pan with oil or butter
Quarter squash and scrape out seeds and pulp. A melon baller or grapefruit spoon with serrated edge works well for this
Discard pulp and place seeds (some pesky pulp will remain attached) into colander and set aside
Place squash quarters skin side up in the pan
Brush skins with olive oil or melted butter
Fill pan about 1" deep with your chosen liquid
Cover tightly and microwave on high setting until the squash is fork tender, approximately 20 minutes
SEED PREPARATION:
Select a pie tin or other oven-proof shallow pan for roasting seeds. Brush with oil.
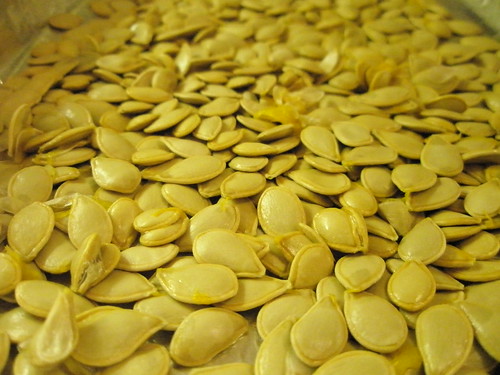
Run seeds in colander under cold water and rub between fingers to remove pulp
Pour seeds out onto a clean kitchen towel or paper towels and pat dry
Place seeds into oiled pie tin or pan and spread in a single layer
OVEN STAGE AND SEED ROASTING:
Preheat oven to 375 and set rack at mid level with another rack below at lowest level
Remove pan of cooked squash from microwave and pour off accumulated liquid
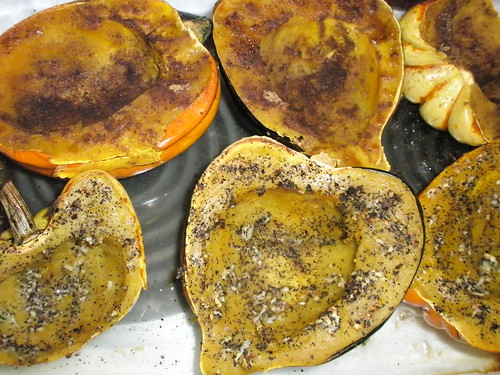
Turn squash pieces skin side down, cut side up
Brush "savory" pieces with butter or oil and top with garlic and pepper
Brush "sweet" pieces with butter or olive oil, then top with combined brown sugar and the other spices
Place pan uncovered into oven on middle rack
Place seed pan into oven on lowest rack.
Bake squash until the toppings are nicely browned and melted, approximately 10 minutes. Watch so they don't burn
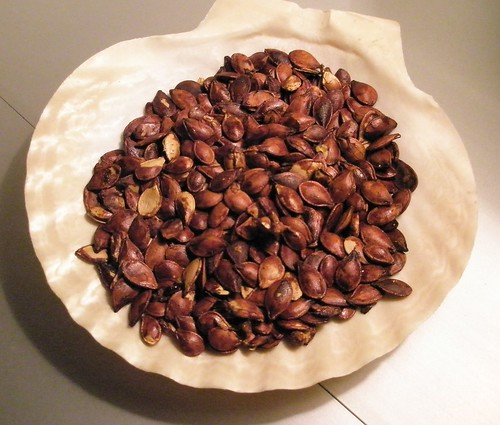
Bake seeds until they dry out and begin to "pop." They will burn easily so keep an eye on them and stir occasionally
The seeds are done when golden brown
If you wish to "teriyaki" flavor the seeds, brush until moistened with soy sauce, teriyaki sauce or (my favorite) Ponzu sauce
Return to oven until the seeds dry again, then remove, cool until you can't wait any longer, then dig in
These same techniques and toppings work well with pumpkin and the seeds are extra tasty.


Comments
November 14, 2008
I LOVE squash.....I'm going to try the recipes, expecially with the seeds....Thanks